 02-05-2010, 05:24 PM
|
#21 |
|
CSL Register Uber-poster!
|
Nice one Craig - i take it you sorted the brakes in the end then?

__________________
 Cha'mone Mother F**ker! |

|

|
|
02-05-2010, 05:50 PM
|
#22 |
|
S5 - Full Throttle

Join Date: Jun 2009
Location: Guisborough
Posts: 453
Casino cash: $4472  |
Ohh yeh forgot to add that bit, yes flushed it through with ATE Super Blue and found 3 small bubbles of air in the rear nearside brake line. So all was good after that!!
|
|
|
|
|
04-05-2010, 12:18 PM
|
#23 | |
|
Driving it like I nicked it

Join Date: Dec 2007
Location: Northern Ireland
Posts: 2,623
Casino cash: $14519  |
Good write up mate, always interesting reading.
Sorry I never managed to collect that stuff off you, I had to sprint off to ROT as I couldn't get through to P&O to change the ferry to Tuesday due to the carry on with Icelands' ash!
__________________
 My Car 2004 M3 CSL with Supersprint Lightweight Race and AP's front and rear Quote:
|
|
|
|
|
|
06-05-2010, 02:47 PM
|
#24 |
|
S5 - Full Throttle
Join Date: Jun 2009
Location: Guisborough
Posts: 453
Casino cash: $4472 |
Cheers Baz, you're going to have to get yourself back over to Germany for the boot carpets just remembered thats where I left them!
|
|
|
|
|
06-05-2010, 03:06 PM
|
#25 |
|
CSL Register Uber-poster!

Join Date: Sep 2009
Location: Olney, Bucks
Posts: 3,735
Casino cash: $9984 |
Good job Craig , nice bumping into you out there mate
__________________
" I use Gleaming Kleen.... for that new car look " I wish I had used - Race Data Systems - Motorsport Data Loggers forgive me Nathan ! 
|
|
|
|
|
15-05-2010, 01:51 AM
|
#26 |
|
S5 - Full Throttle
Join Date: Jun 2009
Location: Guisborough
Posts: 453
Casino cash: $4472 |
Nice bumping into you too Dunc, sorry to hear you're trip down the shops ended in disaster!!!
Well as I mentioned in my last update; the passenger’s side rear trailing arm lower ball joint was showing signs of wear and I thought it was best to replace it. Although it probably would never have caused an issue on the road, with me going back to the Nurburgring on the 20th of May I wasn’t going to risk it. I’ll be honest I wasn’t looking forward to attempting the task, and had visions of me having to drop the rear trailing arm to be able to remove the bush with a press. I did a bit of research and there was mixed responses, some people had managed it with the arm in situ, some had not. Anyway I set aside this weekend to complete the job giving myself time to get the arm to a hydraulic press should I require the use of one. Started the day by removing the rear camber arm and dropping that out the way, once that was out the way I also removed the rear calliper, rear disc, rear handbrake shoes and then removed the bolts holding the heat shield on to allow a bit more clearance underneath. With all the above items out of the way I then gave the ball joint a few quick squirts of WD40 in the hope it would free things up. 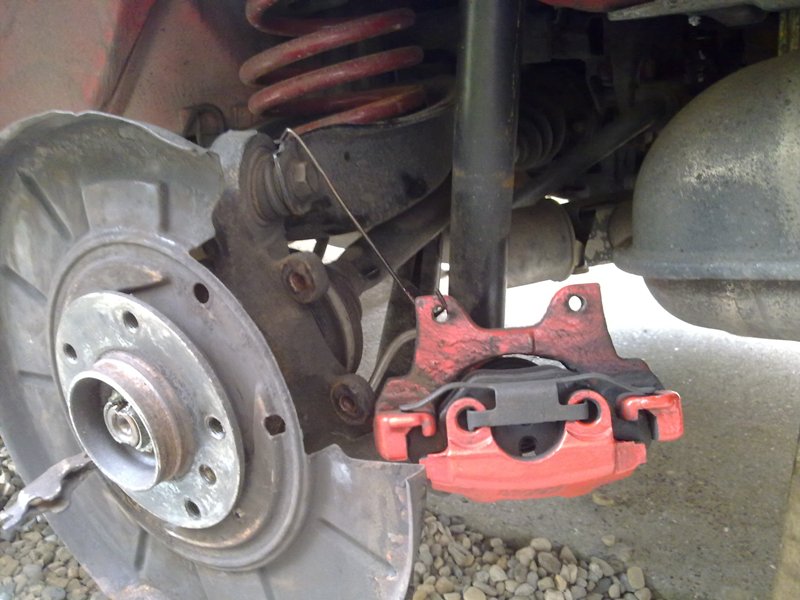 I then set about finding a suitable sized socket to aid the removal of the ball joint, I found with the rubber boot of the joint removed a 1 1/4” socket would fit fine, tapped the socket into place and gave the ball joint a few swift hammer blows. To my surprise the bush was moving so I continued to bash at it until it was free, failing this the tool I made to fit the new ball joint (more on this below) would also double up as an extraction tool. 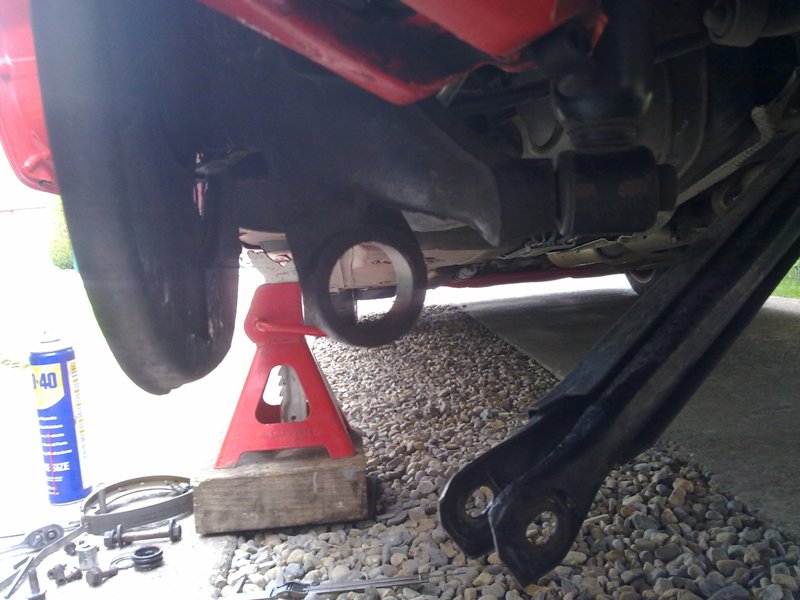 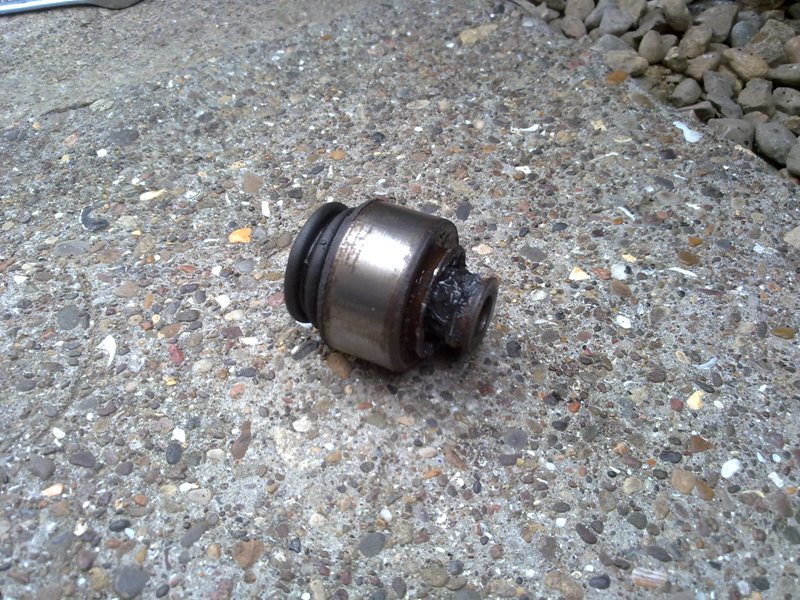 Next step was to fit the new ball joint, I constructed a tool consisting of a bit of tubing, some 5mm steel plate, 10mm threaded bar a 36mm socket and a few 18mm nuts and washers. I drilled a 10mm hole into the steel plate and mounted a length of threaded bar to it with nuts and washers either side to hold it in place, then I welded the steel tube centre of the threaded bar. This would allow the ball joint to be extracted into the tube, if you were removing the ball joint you’d use this with a 1 1/4” socket, but to fit the new ball joint I used a 36mm socket. 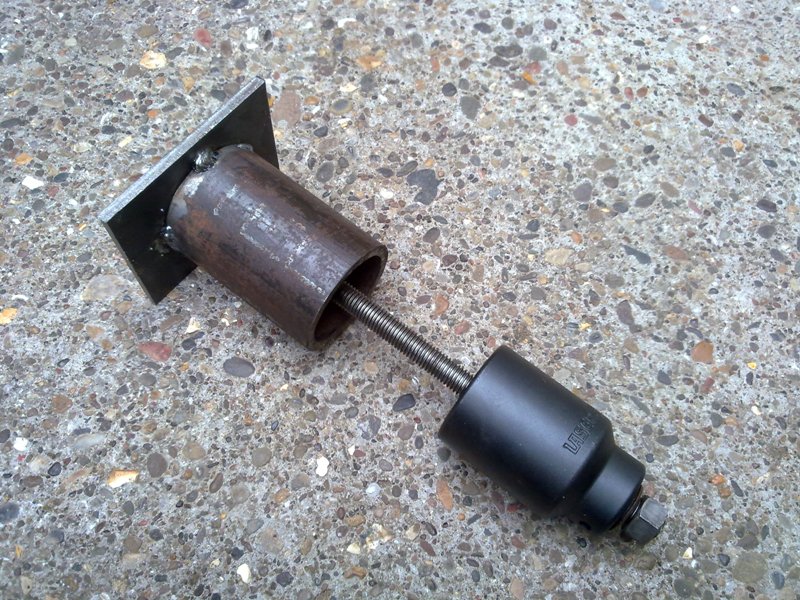 Fitment was simple, place the tool to the back of the hole on the trailing arm, slide the bush along the threaded bar and offer it up to the front of the arm, fit the 36mm socket and then a washer and an 18mm nut. Then simply tighten the nut down until the ball joint is in place. 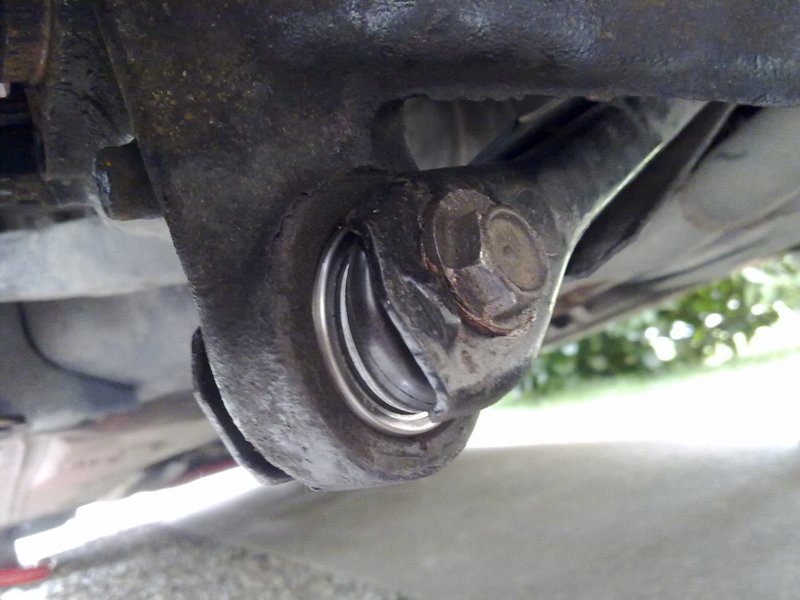 Job done... even had time to pick myself up a new set of NGK spark plugs and fit those too, I went for the bog standard BKR6EK as at the end of the day they’ll get replaced often enough so ‘enhanced’ platinum plugs were not required. |
|
|
|
|
15-05-2010, 10:37 AM
|
#27 |
|
CSL Register Uber-poster!
|
Nice job Craig - i like your ingenuity!
__________________
Cha'mone Mother F**ker! |
|
|
|
|
16-05-2010, 01:23 AM
|
#28 |
|
S5 - Full Throttle
Join Date: Jun 2009
Location: Guisborough
Posts: 453
Casino cash: $4472 |
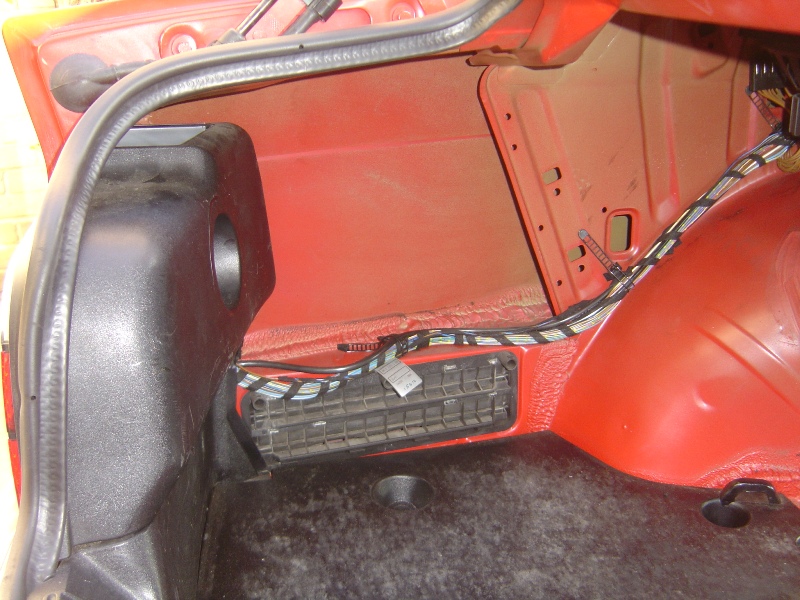
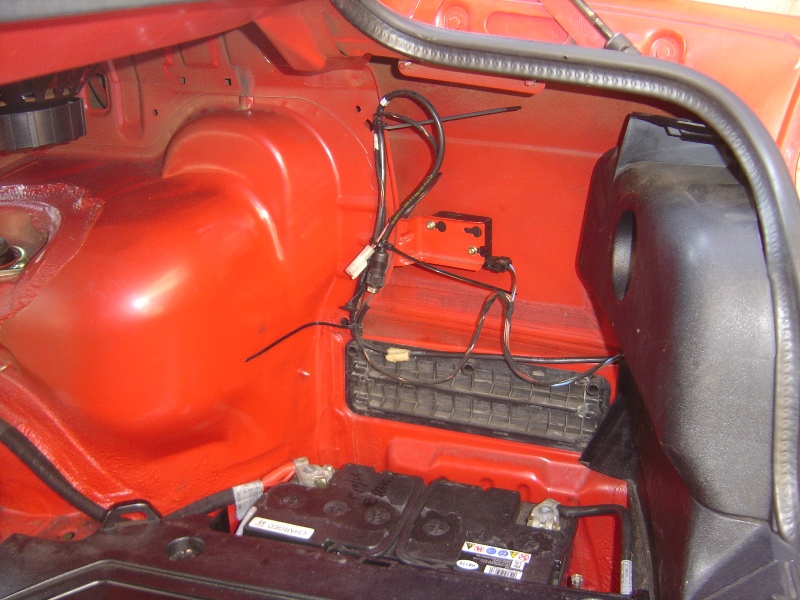
Well today the car was finally committed to the realms of the track car, the weight loss started. I’ll let the pictures do most the talking...
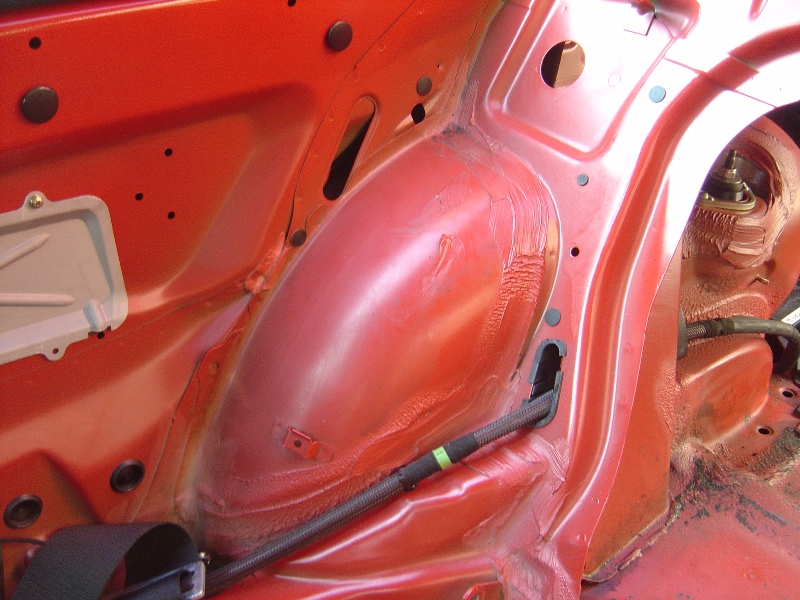
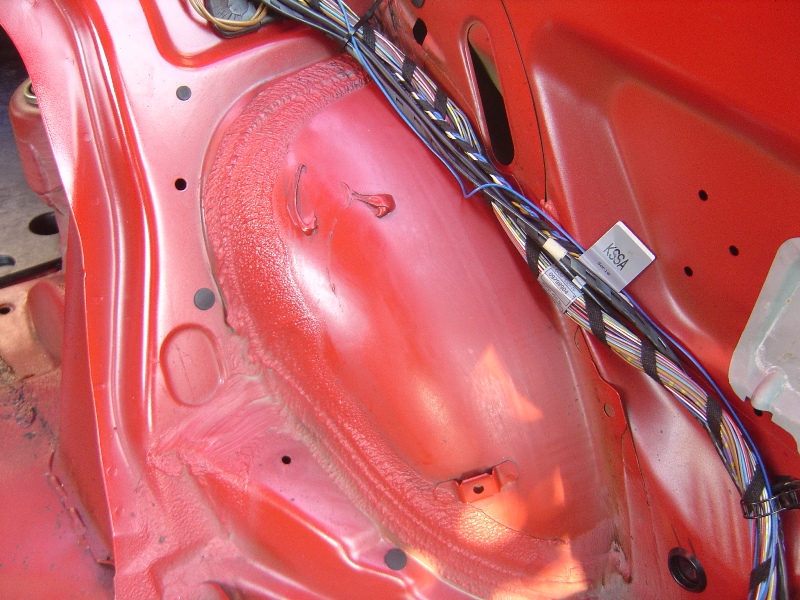
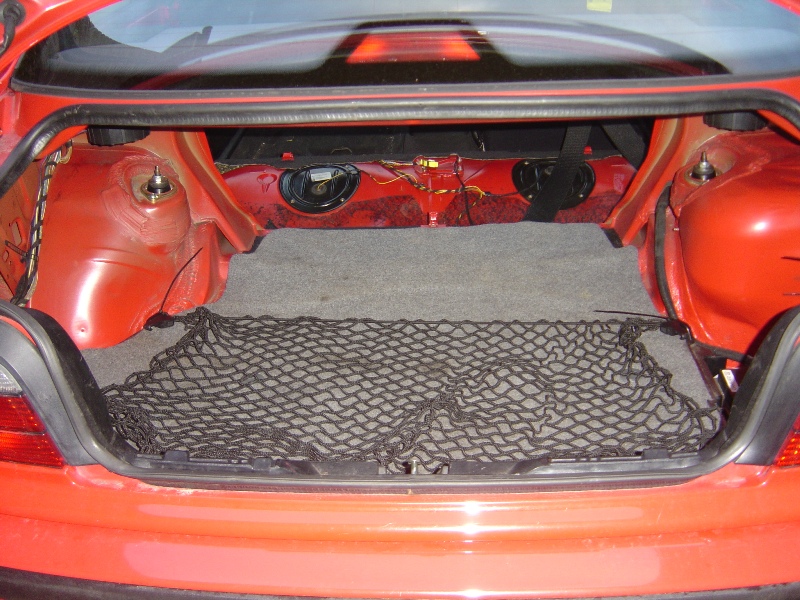 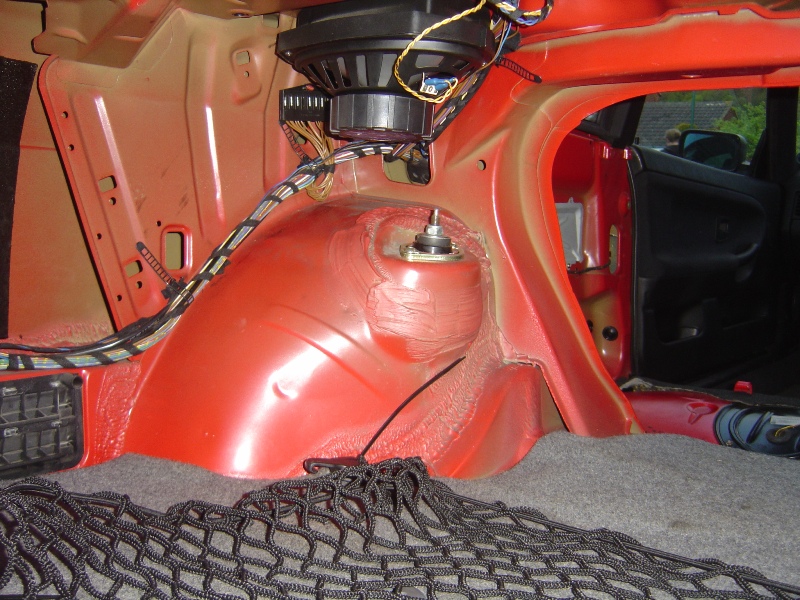 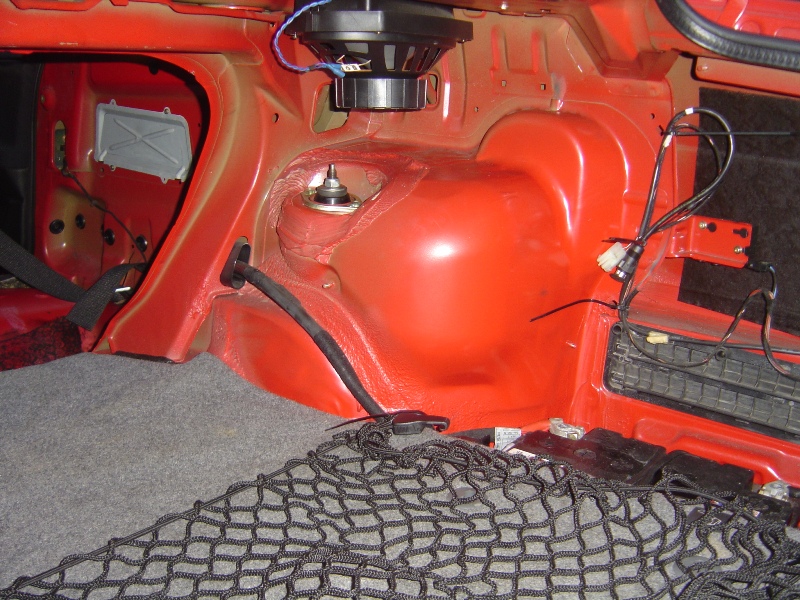 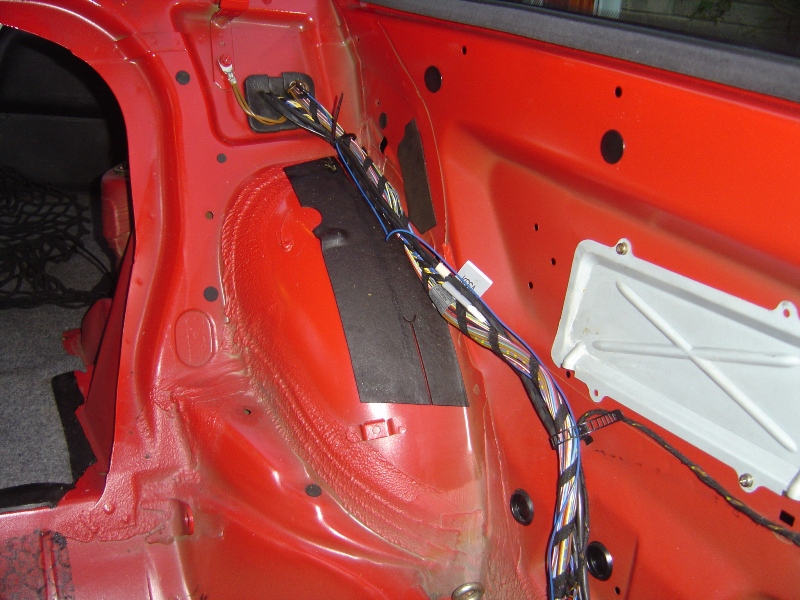 I decided to remove all the carpets from the back, also all the carpet underlay and any other un-needed items in the cabin. The front seat belts were removed including the B-Pillar slide adjuster however I did keep the B-Pillar cover. The plans are; whilst the car is still used as a daily driver the interior is to be finished in a ‘Club Sport’ spec. I’ve removed the bulk of the weight, and will continue to remove un-needed items including the tar sound deadening (more on that below) but I will be keeping the thin boot carpets just without any of the additional sound proofing under layers. I will remove un-needed brackets however I am going to keep the head lining and A/B/C pillar covers, then once the roll cage has been fitted I’ll trim the rear bench and fire wall with a thin black carpet. The idea is to remove as much weight as possible whilst keeping the car within reasonable comfort for travelling in, at this moment in time the car will not be racing so there is no need for drastic weight loss and the few hill climbs and sprints the car will compete in will purely be for enjoyment at the moment. Now onto the tar sound deadening, this stuff is easily removed with a bit of heat and then solvents can be used to clear up the mess left by the glue. I turned to my, well my friends, trusty heat gun to help with the tar removal.  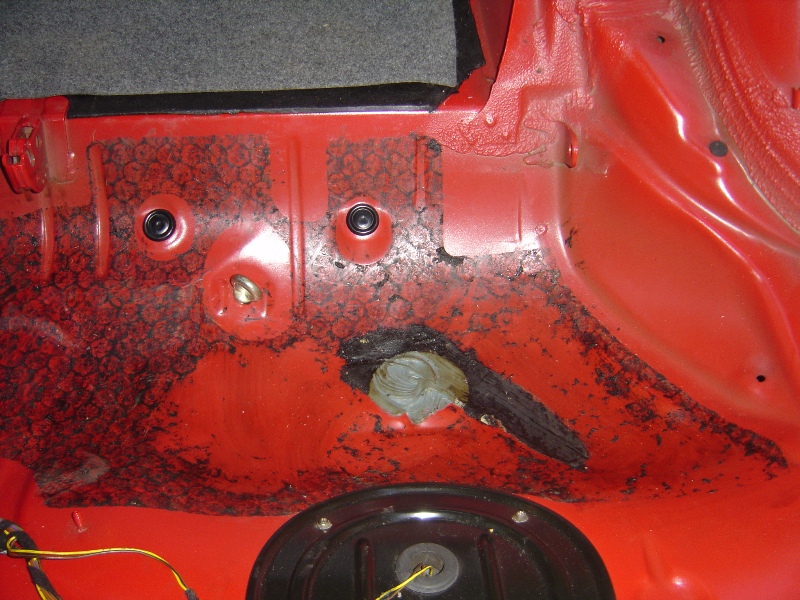 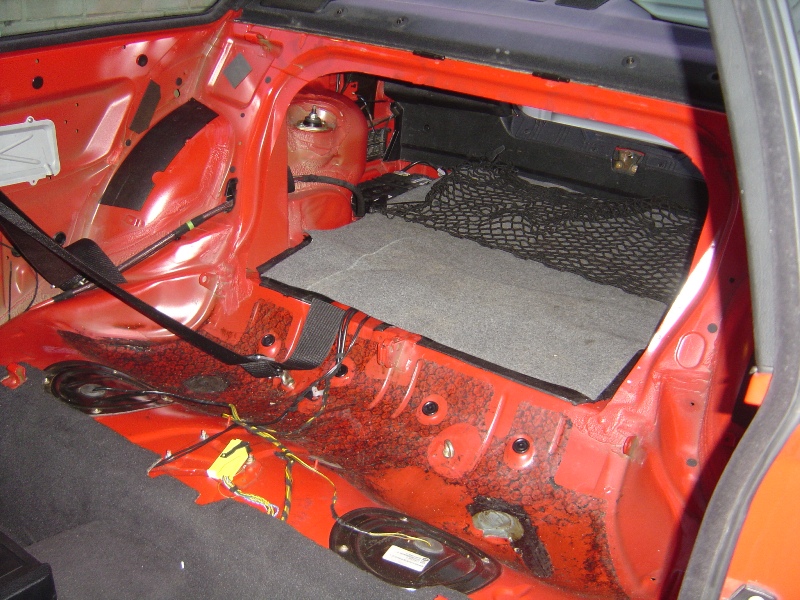 More on this at a later date, sometime in the summer I’ll also remove the main carpet and remove all the tar from under there too.  All the junk removed, only the thin grey boot carpeting and the plastic boot trays will be re-fitted. Going to carry on with more work tomorrow, I’m thinking of just using hair dryer heat on the tar that is affixed to the inside of the body panels such as the doors and rear quarters. |
|
|
|
|
28-05-2010, 07:29 PM
|
#29 |
|
S5 - Full Throttle
Join Date: Jun 2009
Location: Guisborough
Posts: 453
Casino cash: $4472 |
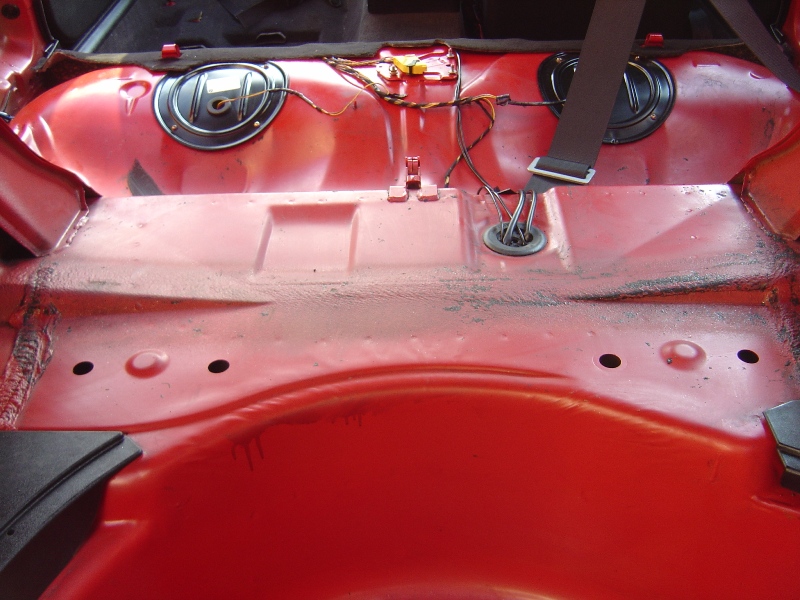
Well the tar removal carried on and the following pieces were removed; Spare Wheel Well, Rear Quarters, Rear Bench, Rear Boot Panel and Inner Arches. I also re-fitted the grey rear boot carpeting and my cargo net which secures down anything in the boot as with the seats removed there is no form of rear bulkhead.
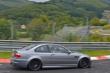
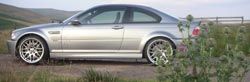
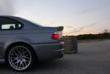
      I then decided to treat the car to a nice holiday in Germany, here’s some pictures from a few of the small towns around Nurburg where we stopped for lunch. The first two pictures are of the car in Cochem the next two were taken in Altenahr, both places are worth visiting if you are in the area!! 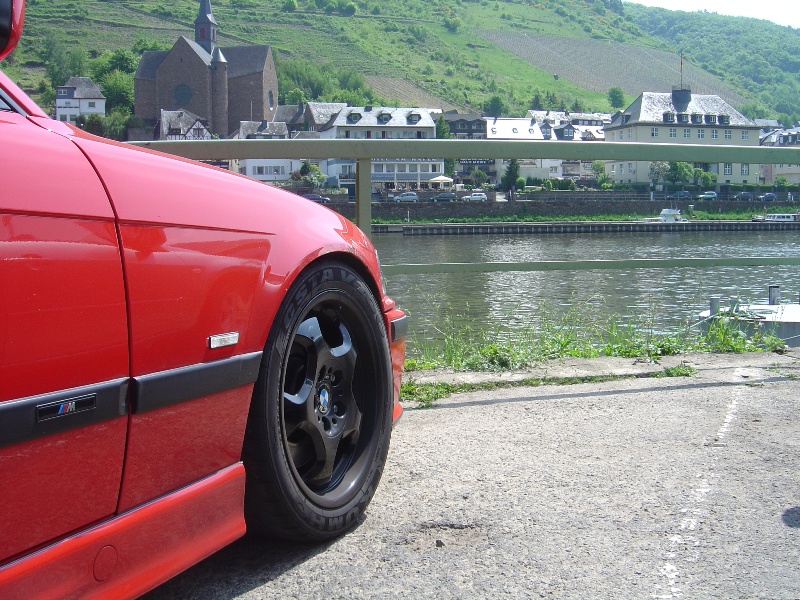 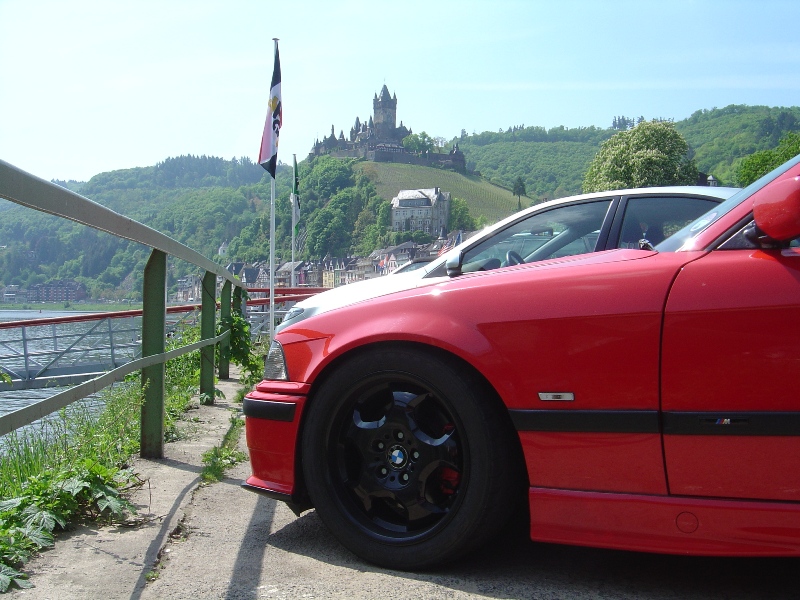  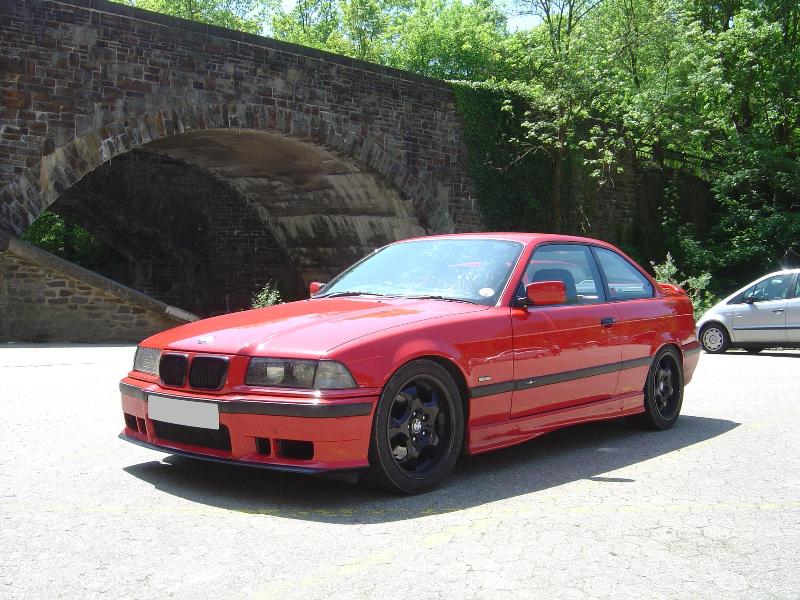 The car was performing near faultlessly all weekend, and it really is punching above its own weight considering it’s meant to be the underdog compared to the M3. The turn in is very sharp, very little feel of under steer and phenomenal levels of mechanical grip. Of course the extra 100bhp would be nice when it comes to the fast uphill sections, but apart from that I am taken back by the capability of this car. I’m not into timing, however one passenger I took out timed me doing an 8:59 in traffic, the same person also followed the 328i out for a lap in manic Sunday traffic and got a 9:11 with plenty of hold ups. The big surprise came when it turned out a Subaru behind me on a quiet lap had a camera sneakily mounted to a motor, he was behind me the whole lap and his video shows him completing an 8:38 with me crossing the gantry a few seconds before him. The one small niggle I did have was a minor one, but it could have lead to a major problem if it wasn’t spotted in its early stages. On one outing, after coming out of Schwalbenschwanz it sounded like a rear bearing had collapsed, coasted off and noticed that below 60mph the noise wasn’t there. Upon further inspection you could see that when the wheels had been refurbished the backs of the wheels which touch the hub had also been painted. Now in April this did not prove to be a problem, however in May with the temperatures a little higher you could see where the paint had gone soft and ‘squeezed’ itself from the back of the bur causing in effect the wheel to come loose. A quick tighten and all was fine, this is one to keep on top of and if need be the paint will be removed. The picture below shows the little strands of paint that have been forced out between the gap. 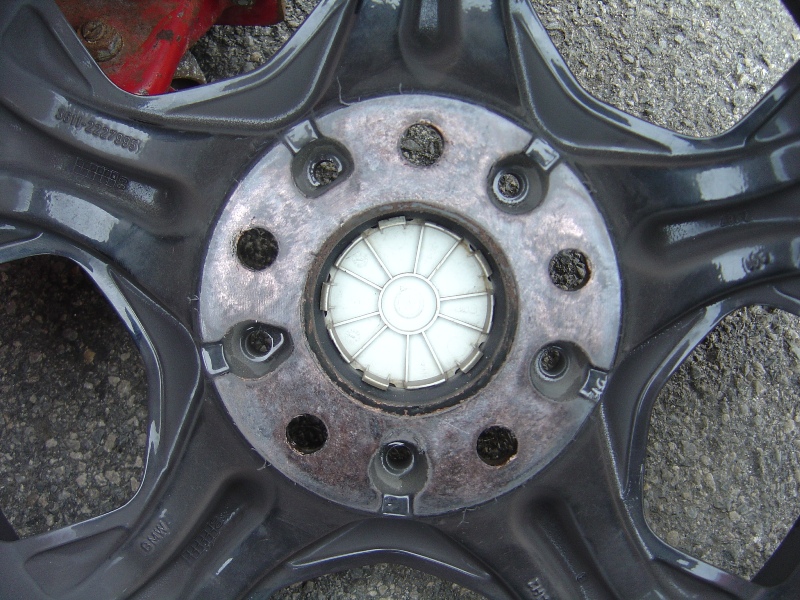 Below, some all important action shots. 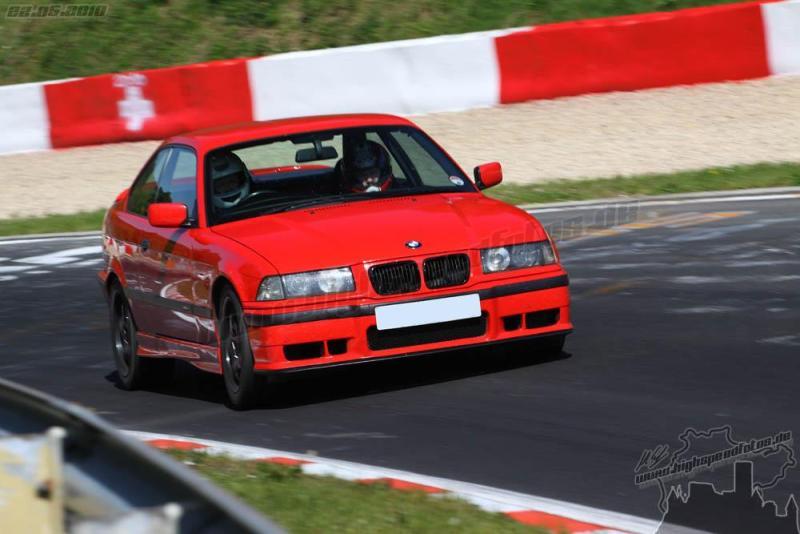 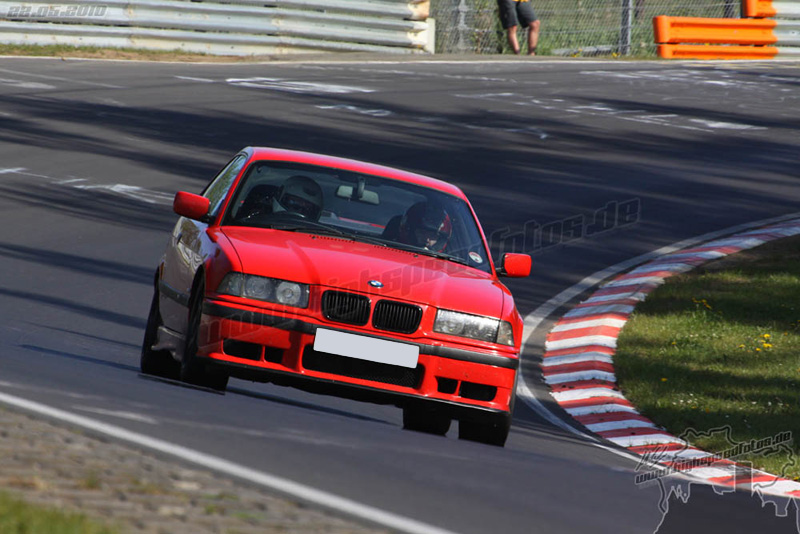 The car has since made it home and been given the once over, all bushes and bearings have been checked plus the brakes have been stripped down and inspected; the front pads have around 25% wear and the rears around 50%. The BMW seems to wear pads at the rate of roughly two rears to every one set of fronts, the pads are wearing well given they have completed over 600 track miles. The only problem of concern which came to light during the trip home is the from passengers side wheel bearing rumbles a little, upon further inspection it sounds dry however there is no play... this will be replaced within the next few weeks as a matter of course. |
|
|
|
|
29-05-2010, 10:27 PM
|
#30 |
|
S3 - On the open road
Join Date: Jun 2009
Location: Germany / Muc
Posts: 88
Casino cash: $840 |
very cool your self made tool
i changed last time on the csl with org. BMW Tool:   
|
|
|
|
 |
|
|


 Linear Mode

