 15-05-2010, 01:51 AM
|
#26
|
|
S5 - Full Throttle
Join Date: Jun 2009
Location: Guisborough
Posts: 453
Casino cash: $4472
|

Nice bumping into you too Dunc, sorry to hear you're trip down the shops ended in disaster!!!
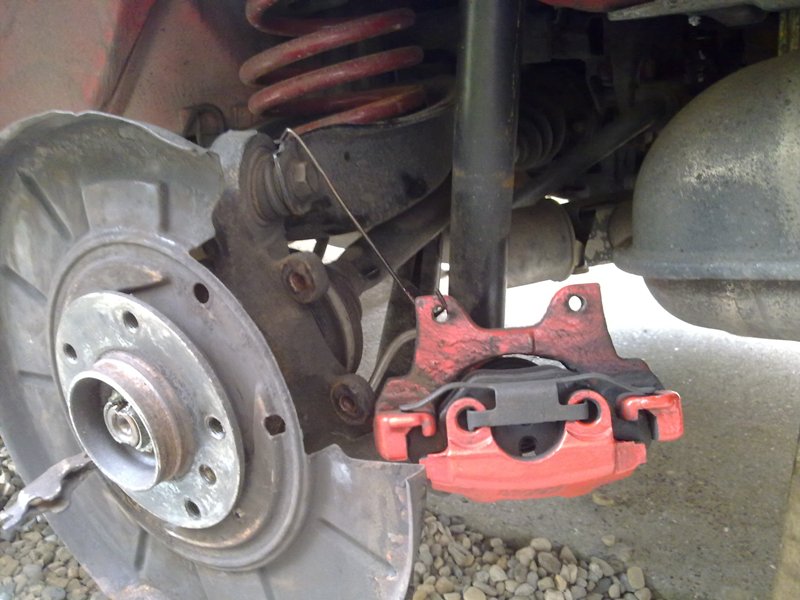
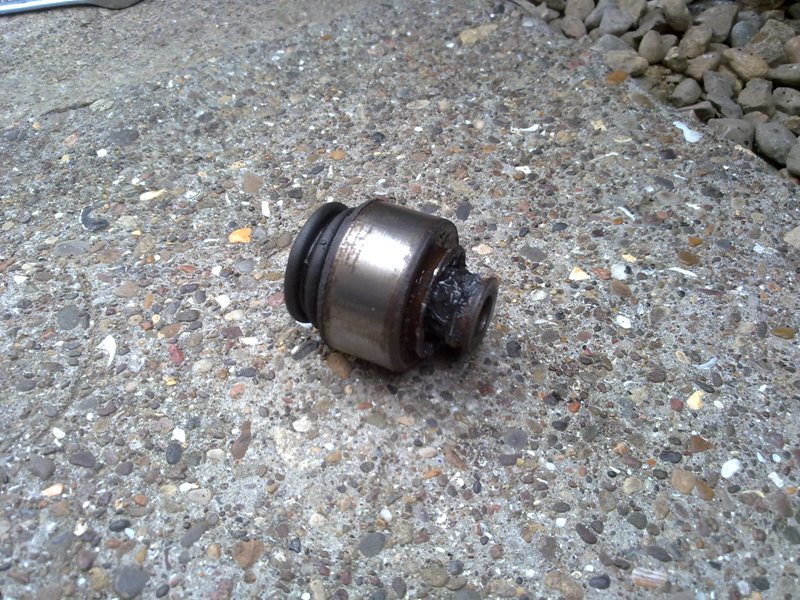
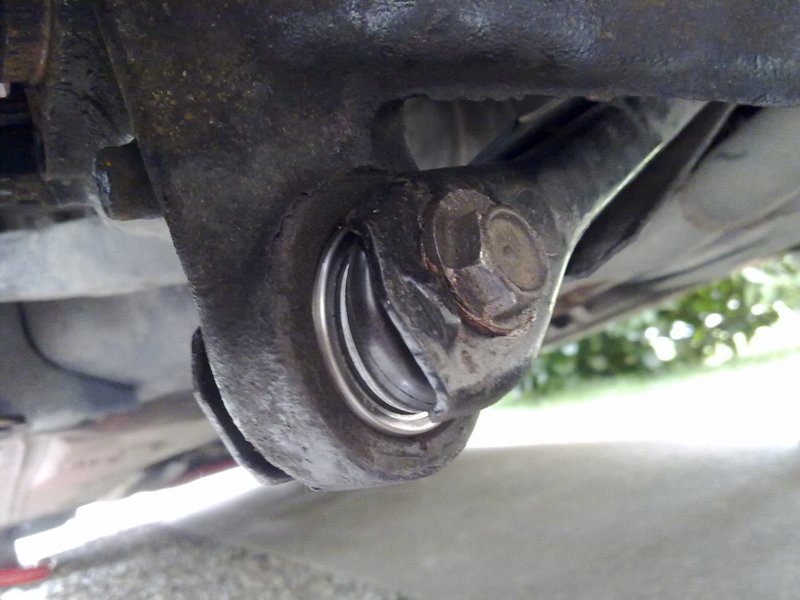
Well as I mentioned in my last update; the passenger’s side rear trailing arm lower ball joint was showing signs of wear and I thought it was best to replace it. Although it probably would never have caused an issue on the road, with me going back to the Nurburgring on the 20th of May I wasn’t going to risk it.
I’ll be honest I wasn’t looking forward to attempting the task, and had visions of me having to drop the rear trailing arm to be able to remove the bush with a press. I did a bit of research and there was mixed responses, some people had managed it with the arm in situ, some had not. Anyway I set aside this weekend to complete the job giving myself time to get the arm to a hydraulic press should I require the use of one.
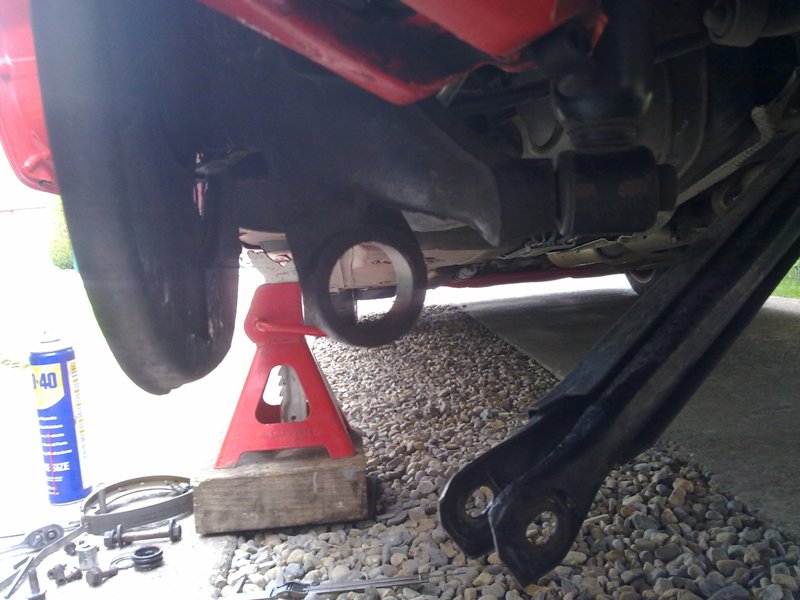
Started the day by removing the rear camber arm and dropping that out the way, once that was out the way I also removed the rear calliper, rear disc, rear handbrake shoes and then removed the bolts holding the heat shield on to allow a bit more clearance underneath. With all the above items out of the way I then gave the ball joint a few quick squirts of WD40 in the hope it would free things up.
 I then set about finding a suitable sized socket to aid the removal of the ball joint, I found with the rubber boot of the joint removed a 1 1/4” socket would fit fine, tapped the socket into place and gave the ball joint a few swift hammer blows. To my surprise the bush was moving so I continued to bash at it until it was free, failing this the tool I made to fit the new ball joint (more on this below) would also double up as an extraction tool.
 Next step was to fit the new ball joint, I constructed a tool consisting of a bit of tubing, some 5mm steel plate, 10mm threaded bar a 36mm socket and a few 18mm nuts and washers. I drilled a 10mm hole into the steel plate and mounted a length of threaded bar to it with nuts and washers either side to hold it in place, then I welded the steel tube centre of the threaded bar. This would allow the ball joint to be extracted into the tube, if you were removing the ball joint you’d use this with a 1 1/4” socket, but to fit the new ball joint I used a 36mm socket.
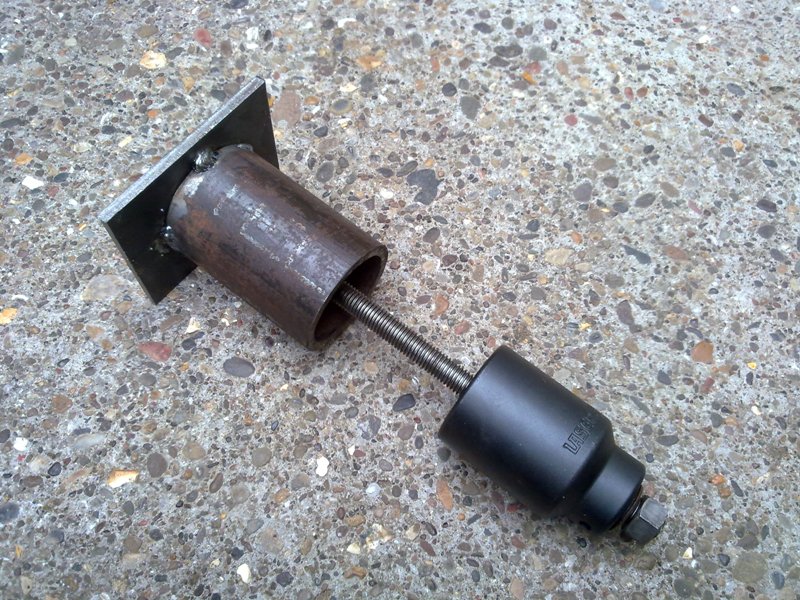 Fitment was simple, place the tool to the back of the hole on the trailing arm, slide the bush along the threaded bar and offer it up to the front of the arm, fit the 36mm socket and then a washer and an 18mm nut. Then simply tighten the nut down until the ball joint is in place.
 Job done... even had time to pick myself up a new set of NGK spark plugs and fit those too, I went for the bog standard BKR6EK as at the end of the day they’ll get replaced often enough so ‘enhanced’ platinum plugs were not required.
|

|

|